Elevate Your Culinary Journey
For anyone who has ever pulled a dry turkey from the oven or a tough brisket from the smoker, the promise of perfectly juicy, flavorful meat can feel like an elusive goal. You can brine for days, marinate for hours, and apply the most exquisite rubs, but these methods often only treat the surface. The real secret to transforming good barbecue into a legendary culinary experience lies deeper – within the meat itself. This is where a simple yet powerful tool, the meat injector, changes the game entirely.
The Secret Weapon for Juicier, More Flavorful Meats
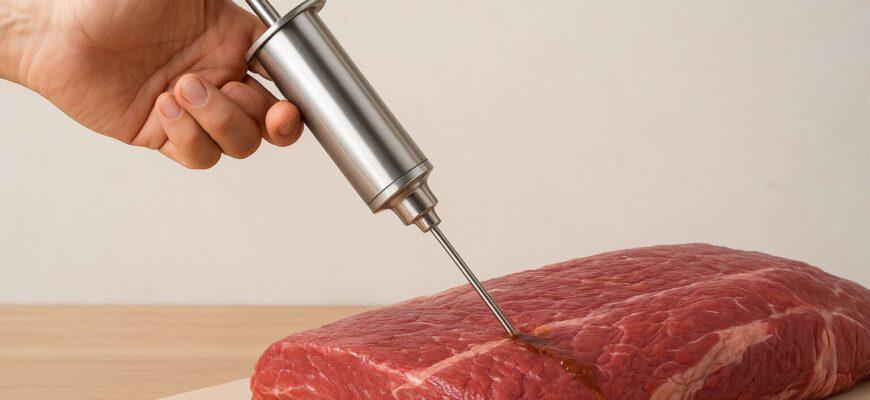
A meat injector is more than just a kitchen gadget; it’s a direct delivery system for flavor and moisture. By using a syringe-like tool with a specialized needle, you can bypass the surface and infuse marinades, brines, and broths directly into the core of any cut. This technique ensures that every bite is as succulent and savory as the last, creating consistently delicious results that surface treatments simply cannot replicate. From a holiday turkey to a competition-style pork butt, the right injector is an indispensable part of a modern cook’s arsenal.
What This Ultimate Guide Will Cover
This comprehensive guide is your resource for mastering meat injection in 2025. We will delve into the science behind why this method is so effective, explore the essential features to look for in the best meat injectors, and provide our top recommendations for every type of user. Furthermore, you’ll gain expert techniques, maintenance tips, and mouth-watering recipes to help you elevate your cooking, whether you’re using a grill, an oven, or a smoker.
Why You Need a Meat Injector: The Science of Deep Flavor and Moisture
Understanding the “why” behind meat injection reveals its profound impact on your final product. It’s not just about adding liquid; it’s about fundamentally altering the meat’s internal environment to guarantee succulence and taste from the inside out.
Beyond the Surface: How Injectors Transform Meat
Injecting bypasses the surface, delivering marinade deep into the muscle for flavor and moisture throughout the entire cut.
Traditional marinades and rubs are limited by the slow process of osmosis, meaning they rarely penetrate more than 1/8 of an inch into the surface of the food. This leaves the interior of large cuts of meat largely unseasoned. Meat injectors solve this problem by mechanically depositing the flavor deep within the muscle tissue. This ensures that the marinade is distributed throughout the cut, seasoning the meat evenly and creating a far more complex and satisfying flavor profile.
The Science of Marinade Penetration and Moisture Retention
When you cook meat, muscle fibers contract and expel moisture. An injected liquid, particularly one containing fats like melted butter or beef tallow, helps to baste the meat from within during the cooking process. This internal basting action counteracts moisture loss, resulting in a juicier final product.
Furthermore, brines injected into the meat contain salt, which increases the solubility of myofibrillar proteins through a process known as the “salting-in effect.” This mechanism works by having salt ions increase the electrostatic repulsive force between muscle filaments, allowing the filament lattice to expand. This structural change creates more space within the muscle fibers, enabling them to hold onto significantly more of their natural juices and water, substantially enhancing overall moisture and tenderness.
Unlocking Unprecedented Juiciness in Turkey, Brisket, Pork & More
Certain cuts are notoriously difficult to keep moist. A lean turkey breast, a massive beef brisket, or a thick pork loin can easily dry out during a long cook. Injection is the most effective defense against this outcome. For a turkey, injecting the breast with a butter and herb marinade ensures it remains succulent. For a brisket, a beef broth injection can add a rich, savory depth and critical moisture needed for a low-and-slow smoke. For pork, an apple juice and spice injection can complement its natural sweetness while keeping it tender.
Enhancing Your Smoking Experience and BBQ Grill Results
For enthusiasts of the smoker or grill, a meat injector is an essential tool. The long cooking times associated with smoking can dehydrate even the most well-marbled meats. By injecting, you’re adding an insurance policy of moisture that helps the meat withstand hours of heat. This not only improves the texture but also enhances the formation of a perfect bark on the exterior, as the internal moisture prevents the surface from becoming tough and leathery. Combined with quality wood chunks for smoking, your entire BBQ experience is elevated from simply cooking food to crafting a masterpiece of flavor.
Decoding the Best Meat Injectors for 2025: Your Comprehensive Buying Guide
Choosing the right injector can feel overwhelming, but focusing on key features and understanding the different types will simplify your decision. The best tool for you depends on your cooking style, the types of meats you prepare, and your budget.
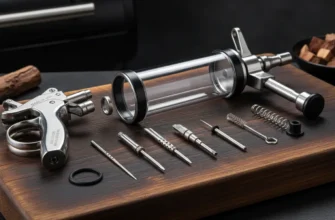
Types of Meat Injectors: Finding Your Perfect Culinary Tool
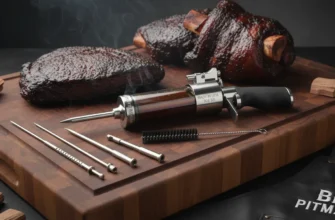
Meat injectors primarily come in two styles: syringe-style and gun-style.
Syringe-Style Injectors: These are the most common type, resembling a large medical syringe. They offer excellent control for precise application and are typically easier to clean. They are perfect for home cooks and most BBQ enthusiasts, available in both plastic and stainless steel models. These are ideal for beginners and those who want maximum control over injection depth and angle.
Gun-Style Injectors: These operate with a pistol grip and trigger mechanism, allowing for consistent, high-volume injection with minimal hand fatigue. They are favored by competition pitmasters and those frequently cooking large quantities of meat. While more expensive, they feature durable construction and faster operation, with many models offering adjustable flow settings. These are built for speed and repetition in high-volume cooking scenarios.
Essential Features to Look For in a Food-Grade Injector
When selecting an injector, consider these critical features:
Material: Food-grade 304 stainless steel is the gold standard for durability, hygiene, and resistance to corrosion from acidic marinades. Plastic models are more budget-friendly but can stain, retain odors, and are less durable over time.
Capacity: Injectors typically range from 1 to 2.3 ounces. A 2-ounce capacity is a versatile sweet spot for most home uses, minimizing the need for constant refilling without being overly bulky. Larger capacities (2.3-2.5 oz) reduce refills for bigger cuts.
Needles: A quality kit includes multiple needles. Look for a wide-mouthed needle (or “jumbo” needle) for thicker marinades with small solids like minced garlic and a multi-hole needle (often with 6, 12, or more holes) for evenly dispersing thin liquids. The quality and sharpness of the needle is paramount for easy penetration without clogging. Some premium kits now include innovative features like the “marinade straw” that slides over multi-hole needles to prevent air gaps.
Ergonomics: A comfortable plunger and grip are essential for extended use. Three-ring plungers offer better stability and control than simple T-handle designs. Rubber-coated handles and spring-loaded trigger mechanisms reduce hand fatigue.
Needle Penetration Depth: For large cuts and whole birds, look for needles that can penetrate 5-6 inches deep. This ensures you reach the interior of thick cuts like whole turkeys and large briskets.
Accessories: A good injector kit often includes a storage case to keep all parts organized, cleaning brushes for the barrel and multi-hole needles, extra silicone O-rings to ensure a long, leak-free life, and increasingly, recipe e-books or user manuals with detailed instructions.
Top Injector Recommendations for 2025 (Categorized for Different Users)
Best Overall: Cave Tools Stainless Steel Meat Injector
This workhorse is made from 100% food-grade 304 stainless steel, offering unmatched durability and a clear viewing window to monitor marinade levels. Its 2.3-ounce capacity and three specialized needles (including one for precise injections and one with multiple holes) make it exceptionally versatile for everything from brisket to chicken. It comes with a protective storage case and is backed by a lifetime money-back guarantee. The metal construction ensures it will last for years of regular use, making it an excellent investment for serious cooks.
Best Budget Option: Ofargo Plastic Marinade Injector or Ofargo Stainless Steel Injector
For beginners or infrequent users, Ofargo offers excellent value in both plastic and stainless steel options. The plastic version is BPA-free, lightweight, and easy to handle, typically coming with multiple stainless steel needles. The stainless steel version, made from 304-grade steel, offers better durability at a reasonable price point with a 2-ounce capacity, four needles, five spare silicone O-rings, cleaning brushes, and an e-book with recipes. Both options provide a great entry point into the world of injection, with the stainless model offering excellent long-term value and the plastic model perfect for occasional use or gifting.
Best Ease of Use: OXO Good Grips Flavor Injector
Known for user-friendly design, OXO delivers an injector with clear measurement markings (up to 2 oz), a large comfortable non-slip handle, and two color-coded stainless steel needles – one for thick marinades and one for thin liquids – that store inside the plunger when not in use. It’s simple, effective, and easy to clean. The BPA-free Tritan plastic tube is durable and transparent, allowing you to see exactly how much marinade remains. This is ideal for cooks who prioritize intuitive design and minimal complexity.
Best for Turkey: Premiala Awesome Meat Injector
This sturdy injector is made from stainless steel throughout all food-contact surfaces, featuring a robust 2.3-ounce capacity and four precision needles including a jumbo needle for marinades with larger particles. What sets it apart is the innovative “marinade straw” – an oversized needle that slides over the multi-hole needle to prevent air gaps, solving a common frustration with 12-hole needles. This design makes it 60% faster to fill and 100% easier to use. It comes with spare O-rings and an e-book with recipes, backed by a lifetime warranty. The three-ring handle provides excellent grip control, and all parts are dishwasher-safe, making it perfect for holiday cooking and large birds.
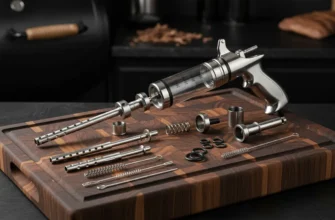
Best for Competition/Large-Scale Use: SpitJack Magnum Meat Injector Gun
For the serious professional or competitor, the SpitJack Magnum is the ultimate tool. This gun-style injector features a patented dose dial that lets you adjust the flow from 1-5 ml per trigger pull, providing unparalleled consistency and speed for large-scale operations. It penetrates up to 5.5 inches into meat – ideal for whole turkeys and massive briskets – and features a 1.7 oz capacity. The kit includes four needles (slanted open-tip, closed-end with side perforations, jumbo oversized needle, and small precision needle) along with three cleaning brushes and a rugged carrying case. Made with medical-grade construction from nickel-plated brass and die-cast zinc with FDA food-safe O-rings, this injector is built to last through hundreds of cooks. This is the model used by top BBQ competitors worldwide and represents the gold standard for professional performance.
Best Lightweight Option with Automatic Features: J&B Goods Professional Automatic BBQ Meat Marinade Injector
This pistol-grip style injector features 5 flow settings, allowing you to dial in the exact amount of marinade with each pull of the trigger. Unlike traditional syringe-style injectors that require manual plunging, the automatic mechanism reduces hand fatigue significantly, making it ideal for injecting multiple large cuts. It includes four stainless steel needles, cleaning tool, and a storage case. Best suited for cooks who inject frequently and value speed and ergonomic comfort.
Best Baster Combo: Norpro Deluxe Stainless Steel Baster with Injector and Cleaning Brush
For cooks who want versatility, the Norpro 3-piece set combines a high-quality baster (1.5 oz capacity) with stainless steel construction and a silicone bulb rated to 450°F. It includes a removable marinade injector needle and cleaning brush. The dual functionality makes it perfect for traditional basting while also allowing you to inject marinades directly. The heat-resistant design is ideal for working with hot broths and pan drippings during cooking. A great value for those who want one tool that performs multiple functions.
Additional Notable Options Worth Considering
Grill Beast Stainless Steel Meat Injector Kit: Built from high-grade 304 stainless steel with a 2 oz capacity and ergonomic handle, this injector includes multiple needles that resist clogging and bending. It’s dishwasher-safe and comes with an e-book. A solid mid-range choice with excellent durability and performance.
Premiala Awesome Meat Injector (Alternative Features): In addition to the version listed above, Premiala also offers an e-Book with detailed usage instructions and recipes, spare O-rings, and a lifetime warranty on all models.
Mastering the Art of Meat Injection: Techniques for Optimal Results
Owning a great injector is only half the battle. Proper technique ensures your marinade is delivered effectively, maximizing flavor and moisture without damaging the meat’s texture.
Preparing Your Meat Injection Solution: Crafting the Perfect Marinade or Brine
The consistency of your injection liquid is critical. Marinades must be thin enough to pass through the needle without clogging. Here’s how to prepare:
Strain or Blend: For marinades containing herbs, garlic, or spices, blend them until they are extremely fine and then pass the liquid through a fine-mesh sieve. Any solid particle larger than the needle opening will cause a clog.
Use Powders: Opt for powdered garlic, onion, and other spices instead of minced versions for a smoother, clog-free liquid. This is the single most important step in preventing needle clogs.
Dissolve Solids: Ensure that salt, sugar, and other soluble ingredients are completely dissolved in your liquid base (broth, juice, or water) before drawing the marinade into the injector. Warming the mixture slightly can help ensure complete dissolution.
Cool Before Injection: Always let the injection mixture cool to room temperature before drawing it into your injector. This prevents the silicone O-rings from degrading and ensures even distribution during the rest period.
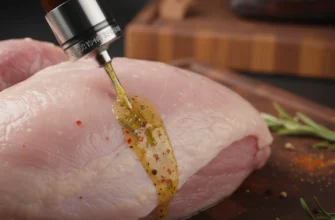
Prepping Your Meats for Injection: Setting the Stage
Preparation is simple but important. Pat your chosen meat – be it pork, chicken, or beef – dry with paper towels. This helps the injection solution absorb more effectively and prevents excess runoff. Place it in a deep pan or on a rimmed baking sheet to catch any marinade that might leak out during the injection process. This keeps your workspace clean and allows you to reuse any runoff.
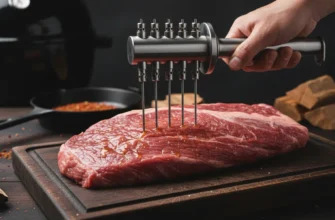
Precision Injection Techniques for Specific Cuts
Your injection pattern should be systematic to ensure even distribution:
Create a Grid: Mentally divide the surface of the meat into a one-inch grid. Plan to inject at the intersection of each grid line, adjusting spacing based on meat size and thickness.
Vary Depth and Angle: At each injection site, insert the needle deep into the meat. As you slowly depress the plunger, gradually pull the needle out while maintaining steady pressure. This technique distributes the marinade throughout the muscle fibers, creating a fan-like pattern. You can also change the angle of the needle from a single insertion point to distribute marinade in multiple directions without creating additional holes.
Inject with the Grain: Whenever possible, insert the needle parallel to the muscle grain. This helps the marinade spread more naturally throughout the muscle fibers. For a large cut like a brisket, focus on the thickest part of the flat and inject about every 1-2 inches. For a turkey, prioritize the breast meat, which tends to dry out first, and inject the thighs and drumsticks as well.
Avoid Bones and Joints: Do not inject directly into or near bones, as the marinade will not stay in place. Similarly, avoid injecting into joints or thin areas where the liquid will simply leak back out.
Maximizing Flavor and Moisture Absorption After Injection
After injecting, the meat needs time for the marinade to work its magic:
Resting Time: Allow the meat to rest in the refrigerator for at least 4 hours, and ideally 8-24 hours. This gives the salt time to modify myofibril protein structure and the flavors to meld with the meat. For faster cooking or smaller cuts, a minimum of 2-3 hours is acceptable, though longer resting always produces superior results.
Containment: Place the injected meat in a sealable bag or a covered container during its rest. This prevents any leakage and allows the meat to reabsorb any marinade that escapes. A little liquid may pool, which is normal and beneficial.
Temperature: Keep the injected meat at refrigerator temperature (below 40°F) during the entire rest period to prevent bacterial growth and ensure food safety.
Essential Care and Troubleshooting for Your Meat Injector
Proper maintenance ensures your injector remains a hygienic and reliable culinary tool for years. Knowing how to solve common issues will keep your cooking process smooth and frustration-free.
Cleaning and Maintenance: Ensuring Longevity and Hygiene
Immediate cleaning after each use is non-negotiable. Marinades, especially those with sugar or fats, can congeal and clog the narrow needle and barrel, making subsequent uses difficult.
Disassemble Completely: Take the injector apart immediately after use, separating the needle, plunger, and barrel. Do not let residue dry on the components.
Wash Thoroughly: Use warm, soapy water and the provided cleaning brushes to scrub the inside of the barrel and each needle. Pay close attention to the small holes on multi-port needles, using a thin brush or even a piece of dental floss if necessary. For the O-rings, wash gently but thoroughly.
Sanitize and Dry: For stainless steel models, you can often sanitize parts in boiling water or a dishwasher (check manufacturer instructions). Always allow all components to air dry completely before reassembly to prevent mold or bacterial growth. Store it in its protective case in a dry location.
Lubricate O-Rings: Before storage, apply a thin coat of food-grade mineral oil or vegetable oil to the O-rings. This prevents them from drying out and cracking, which would compromise the seal and cause leaks. Wipe away excess oil.
Common Injection Issues and How to Solve Them
Clogged Needle: This is the most frequent problem, almost always caused by a marinade that is too thick or contains solids.
Solution: Immediately stop and clear the needle using a needle cleaning brush (usually included) or a very thin piece of wire. Push gently to avoid damaging the needle. Once cleared, strain your marinade again through a fine-mesh sieve to remove any remaining particulates before continuing. In the future, use powdered spices and ensure complete dissolution of salts and sugars.
Marinade Leaking Out of the Barrel: Some leakage is normal, but excessive runoff means you’re injecting too quickly or too much liquid in one spot.
Solution: Slow down your injection rate significantly. Depress the plunger gently and steadily, never with jerky motions. As you inject, pull the needle out slowly to allow the meat to absorb the liquid. Never leave the needle stationary while injecting at full pressure. Check that the O-ring is clean and properly seated; if the injector continues to leak, the O-ring may need replacement (spares are usually included).
Uneven Flavor Distribution: This occurs from a poor or unsystematic injection pattern.
Solution: Be more systematic with your grid pattern. Ensure you are injecting smaller amounts of liquid in more locations rather than large amounts in fewer spots. Mark your injection points mentally or with a light scoring of the meat surface before beginning. Typically, 1-2 teaspoons per injection point prevents creating large pockets where the marinade doesn’t mix evenly with the meat.
Air Pockets in Multi-Hole Needles: When using 12-hole or similar multi-hole needles, as the marinade level drops below the needle openings, air gets sucked in instead of marinade.
Solution: Fill the injector as completely as possible, or invest in an injector with a “marinade straw” feature (like the Premiala) that solves this problem. Alternatively, you can use a single-hole needle as your primary needle and reserve multi-hole needles for when you have plenty of marinade to work with.
Bent or Dulled Needles: Repeatedly injecting into hard areas of meat or applying excessive force can bend or dull needles.
Solution: Replace the needle with a spare (most kits include extras). Store needles separately and handle them carefully. Avoid forcing the needle through bones or cartilage – find softer muscle areas instead.
Recipes & Ideas: Putting Your Injector to Work
Theory is great, but practice is what creates delicious food. Here are some simple, effective injection recipes to get you started.
Ultimate Juicy Turkey Injection Recipe for the Holidays
This recipe ensures your Thanksgiving turkey is bursting with moisture and classic savory flavor. Best used for roasting a 12-16 pound turkey.
Ingredients:
- 1 cup chicken broth (low-sodium preferred)
- ½ cup melted unsalted butter
- 2 tbsp Worcestershire sauce
- 1 tsp onion powder
- 1 tsp garlic powder
- 1 tsp black pepper
- ½ tsp kosher salt (optional, adjust to taste)
Instructions:
- In a small saucepan over medium heat, melt the butter.
- Add chicken broth, Worcestershire sauce, onion powder, garlic powder, and black pepper.
- Whisk all ingredients together until smooth and well combined.
- Heat until steaming but do not boil. Remove from heat and let cool to room temperature (about 15-20 minutes).
- Strain through a fine-mesh sieve to remove any particles.
- Draw up the injection mixture and inject throughout the turkey breast, thighs, and legs, using approximately 0.5-0.75 ounces of liquid per pound of turkey (about 6-12 oz total for a 12-16 lb bird). Insert the needle fully, then slowly pull back as you press the plunger.
- Let rest overnight (or at least 8-12 hours) in the refrigerator before roasting.
Pro Tip: For smoked or deep-fried turkeys, you can increase the injection to 0.75-1.0 oz per pound. Reserve any remaining injection to brush over the turkey skin before cooking for additional flavor and moisture.
Competition-Style Brisket Injection for Your Smoker
This injection enhances the beefy flavor of brisket and keeps it moist during a long, low-temperature smoke. Works beautifully on a 12-16 pound whole packer brisket.
Ingredients:
- 2 cups low-sodium beef broth (or beef stock)
- 2 tbsp soy sauce
- 1 tbsp Worcestershire sauce
- 1 tsp garlic powder
- ½ tsp onion powder
- ½ tsp black pepper
- 1 tbsp butter (optional, for additional richness)
- 1 tsp brown sugar (optional, for depth)
Instructions:
- Combine all ingredients in a small saucepan.
- Heat over medium heat, stirring occasionally, until the mixture reaches a simmer and sugar (if using) is fully dissolved, about 3-5 minutes.
- Remove from heat and let cool to room temperature (30-40 minutes).
- Strain through a fine-mesh sieve to ensure no particles will clog your injector.
- Inject the cooled brisket in a systematic grid pattern across the flat and point, leaving about 1.5-2 inches between insertion points. Use approximately 0.5 ounces of liquid per pound of brisket.
- Let rest for at least 4 hours in the refrigerator, ideally 8-12 hours before smoking.
Pro Tip: Apply your dry rub 30-60 minutes before the brisket goes on the smoker, after the injection has rested. Some competition cooks inject the night before and wrap the brisket tightly in plastic wrap for better flavor integration.
Savory Pork Butt Injection for Mouth-Watering Pulled Pork
This injection adds a layer of tangy, savory flavor that perfectly complements pulled pork. Perfect for a 8-10 pound pork butt destined for the smoker.
Ingredients:
- 1 cup apple juice (unsweetened preferred)
- ½ cup apple cider vinegar
- ¼ cup water or additional apple juice
- 2 tbsp brown sugar
- 1 tbsp kosher salt
- 1 tsp garlic powder
- 1 tsp onion powder
- ½ tsp black pepper
- ¼ tsp cayenne pepper (optional, for heat)
Instructions:
- In a saucepan, combine apple juice, apple cider vinegar, water, brown sugar, and salt.
- Heat over medium heat, stirring until sugar and salt are fully dissolved, about 5 minutes.
- Remove from heat and add garlic powder, onion powder, black pepper, and cayenne pepper if using.
- Allow to cool to room temperature.
- Strain if any solids remain.
- Inject evenly throughout the pork butt, using about 0.75-1.0 oz per pound (6-10 oz total for an 8-10 lb butt).
- For pork butt, you can begin cooking as soon as 2-4 hours after injection, though 8-12 hours is better for deeper flavor integration.
Pro Tip: This injection works quickly and is excellent for pork because it complements the meat’s natural sweetness. Many pitmasters also reserve some injection to spritz the meat every hour during smoking for additional moisture and flavor.
Quick & Flavorful Chicken Breast Injection
Turn boring chicken breasts into a gourmet meal with this simple injection. Perfect for 4-6 chicken breasts (6-8 oz each).
Ingredients:
- ½ cup chicken broth (low-sodium)
- 2 tbsp melted butter
- 1 tbsp fresh lemon juice
- ½ tsp dried thyme (or 1 tsp fresh)
- ¼ tsp garlic powder
- ¼ tsp salt
- Pinch of black pepper
Instructions:
- In a small bowl, whisk together chicken broth, melted butter, lemon juice, thyme, garlic powder, salt, and pepper.
- Let cool slightly to room temperature.
- For each chicken breast, inject into the thickest part, creating a fan pattern by pulling the needle out slowly as you press the plunger.
- Inject approximately 1-2 tablespoons per breast.
- You can cook immediately or let rest for 30-60 minutes in the refrigerator before grilling, pan-searing, or roasting. The shorter rest time is acceptable for chicken due to the thinner cuts and faster cooking times.
Pro Tip: Chicken breasts cook relatively quickly, so minimize the risk of food safety issues by keeping injection solutions simple and cooking within a reasonable timeframe (same day is ideal).
Alternative Creative Injection Ideas
Don’t limit your injector to just traditional meat preparations:
- Potatoes: Inject mashed potatoes with butter and herbs before baking for layered flavor
- Large Vegetables: Inject peppers or tomatoes with cheese or herb mixtures for unique appetizers
- Desserts: Inject cream, liqueur, or fruit fillings into pastries, doughnuts, or baked goods for decadent treats
- Specialty Meats: Inject wild game with fruit juices or marinades to tenderize and add complexity
- Deli Items: Use for home-cured meats and specialty preparations
Food Safety Considerations When Injecting Meat
While injection is an excellent technique, it’s important to understand food safety implications. Injection needles can potentially translocate bacteria and microorganisms from the meat’s exterior to the interior. To minimize risk:
- Use clean, sanitized needles for each session
- Keep injected meat refrigerated at 40°F or below throughout the rest period
- Do not leave injected meat at room temperature for extended periods
- Use a meat thermometer to ensure internal temperatures reach safe levels (165°F for poultry, 160°F for pork, 145°F for beef)
- Wash your hands and surfaces thoroughly after handling raw meat
Elevate Your BBQ Experience and Culinary Journey in 2025
A meat injector is more than a tool; it’s a gateway to achieving cooking results you previously thought were reserved for professional chefs and pitmasters. By delivering moisture and flavor directly to the core of your food, you gain unprecedented control over the final product and can create consistently outstanding results.
The Injector: Your Secret Weapon for Consistently Delicious Results
The true value of a meat injector lies in its consistency. It removes the guesswork and variability associated with brining and marinating large cuts of meat. No matter the occasion, you can be confident that your turkey, brisket, or pork roast will be succulent, tender, and deeply flavorful, elevating your entire cooking experience and impressing family and guests alike.
Final Tips for Becoming an Injection Master: Practice and Experimentation
The best way to master your injector is to use it regularly. Start with the simple recipes provided and don’t be afraid to experiment. Create your own marinades, try injecting different foods, and pay close attention to the results. Adjust injection amounts based on the size and type of meat. Keep notes on what works best for your taste preferences and cooking methods.
With a little practice and the right equipment, your meat injector will become one of the most valuable and frequently used tools in your kitchen and on your grill. Whether you’re preparing a weeknight dinner or hosting a competitive BBQ competition, mastering the art of meat injection will unlock new levels of flavor, juiciness, and culinary satisfaction that will keep your guests asking for your secret.